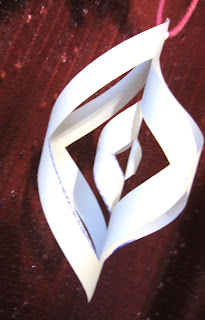
Snowflake/Icicle Craft Tutorial (Do It With Your Preschooler!)
This festive icicle takes shape in just minutes, and it strengthens small muscles in your preschooler's hand too! I'm including instructions on how to make this paper snowflake or icicle...whatever you want to call it! We made a bunch and hung them from the ceiling for our preschool winter theme! If you make six you can tape them together to make a gorgeous snowflake too!
How to Make a Paper Snowflake / Icicle:
1. Start with a square:
2. Fold it to make a triangle:
3. Draw "cutting lines" on it like this and let your child cut them: (Make sure the cuts do NOT meet in the middle!)
4. Open up the square!
5. Fold the middle two flaps together and tape them:
6. Flip the square over and repeat step five with the next two flaps:
7. Flip the square over again and repeat step five with the next two flaps:
8. Flip the square over again (this is the last time!) and repeat step five with the outer two flaps:
9. Ta Da! All done! You can tie a string on and hang your icicle, or make five more and tape them together in a circle to make a snowflake!
While you're making paper snowflakes, hop over and check out how to make a 6 sided snowflake! They're loads of fun and super pretty too...they'd make a great addition to your winter theme decorations!
Happy Educating,
Carla


Comments